How to Create Your Own Obby Course in Roblox: From Beginner to Pro
Related Articles
- Level Up Faster In Roblox Tycoon Games: The Ultimate Guide
- Unlocking The Secrets To Game Pass Success: A Comprehensive Guide To Boosting Roblox Earnings
- Roblox’s Best Games For Solo Players: A Guide To Unlocking Your Inner Hero
- Unlocking The Secrets: Your Guide To Roblox Development Groups
- Top Tips To Build Large-Scale Maps In Roblox: From Beginner To Pro
Introduction
In this article, we dive into How to Create Your Own Obby Course in Roblox: From Beginner to Pro, giving you a full overview of what’s to come
How to Create Your Own Obby Course in Roblox: From Beginner to Pro
Roblox is a platform brimming with creativity, and one of its most popular genres is the obstacle course, affectionately known as "obby." Creating your own obby isn’t just about building a series of challenges; it’s about crafting an engaging experience that tests players’ skills and rewards them with a sense of accomplishment. This guide will take you on a journey from the fundamentals of obby creation to advanced techniques, revealing some big secrets along the way, to help you build your own epic obstacle course.
Part 1: The Foundation – Building Your Obby’s Structure
1.1 Choosing Your Theme
The first step is deciding on a theme for your obby. This will influence everything from the environment to the obstacles themselves. Here are some ideas to get you started:
- Classic: A traditional obby with a focus on platforming, jumps, and basic physics challenges.
- Adventure: A more immersive experience with a storyline, puzzles, and perhaps even a quest to complete.
- Fantasy: Utilize magical elements, flying platforms, and fantastical creatures to create a unique and whimsical atmosphere.
- Sci-Fi: Explore futuristic environments with gravity-defying obstacles and advanced technology.
- Horror: Embrace eerie settings, jump scares, and challenging puzzles to create a thrilling experience.

1.2 Selecting the Right Tools
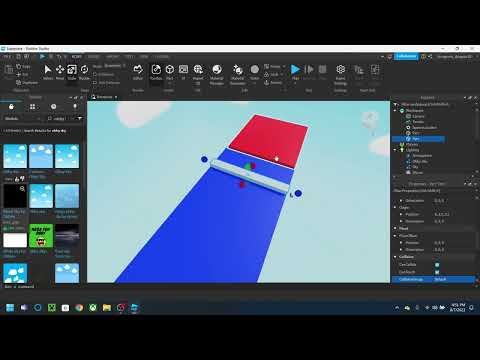
Roblox Studio is your primary tool for building obby courses. It provides a user-friendly interface and a wide range of tools for creating environments, placing objects, and scripting interactions.
- Building Tools: Become familiar with the various building tools in Roblox Studio, including the "Move" tool, the "Rotate" tool, and the "Scale" tool. These will be your bread and butter for manipulating objects in your environment.
- Parts: Roblox provides a vast library of pre-made parts, from basic blocks to complex structures. Experiment with different parts to find the right ones for your obby’s design.
- Materials: Use different materials to add visual variety and texture to your obby. Experiment with wood, metal, glass, and other materials to create unique environments.
1.3 Designing the Layout
Now it’s time to sketch out your obby’s layout. Start with a basic outline of your course, including the starting point, checkpoints, and the finish line. Consider:
- Flow: The layout should guide players through the course naturally, avoiding confusing or frustrating pathways.
- Difficulty: Gradually increase the difficulty of obstacles as players progress, making the course engaging and challenging.
- Visual Variety: Use a mix of platforms, ramps, and other elements to keep the environment visually interesting.
- Checkpoints: Strategically place checkpoints to save players’ progress and prevent them from having to start over if they fail.
1.4 Building the Obstacles
Now comes the fun part: building your obstacles! Use your creativity to design challenges that test players’ skills and provide a sense of accomplishment when overcome. Here are some ideas:
- Platforming Challenges: Design sequences where players must jump between platforms, navigate narrow paths, and overcome obstacles.
- Physics Challenges: Utilize gravity and momentum to create challenges where players need to carefully time their jumps or use objects to their advantage.
- Puzzle Challenges: Incorporate puzzles that require players to think strategically and solve problems to progress.
- Timing Challenges: Create obstacles that require players to act quickly and precisely, like dodging moving platforms or timed gates.
Part 2: Bringing Your Obby to Life – Scripting and Gameplay Mechanics
2.1 Introduction to Scripting
Scripting is the key to adding dynamic elements and interactivity to your obby. While it may seem daunting at first, Roblox’s Lua scripting language is relatively straightforward and provides a wide range of functions to manipulate your game world.
- Basic Scripting: Start by learning basic scripting concepts like variables, loops, and conditional statements. These will allow you to control the behavior of objects in your game.
- Event Handling: Utilize event handling to trigger actions based on specific events, such as a player touching a part or pressing a button.
- Functions: Create reusable code blocks called functions to streamline your scripting and make your code more organized.
2.2 Essential Scripting Techniques for Obby Creation
Here are some key scripting techniques that will elevate your obby’s gameplay:
- Respawn Script: Create a script that automatically respawns players at the last checkpoint when they die. This keeps the game flowing and prevents frustration.
- Checkpoint Script: Use a script to activate checkpoints when players touch them, saving their progress.
- Obstacle Activation Script: Trigger obstacles like moving platforms, rotating parts, or traps when players approach them.
- Win Condition Script: Design a script that detects when a player reaches the finish line and triggers a win condition, like a celebratory animation or a message.
2.3 Adding Visual Effects and Sounds
Visual effects and sound can significantly enhance your obby’s atmosphere and immersion. Here are some ways to add these elements:
- Particle Effects: Use particle effects to create visually appealing explosions, sparks, or other special effects.
- Animations: Add animations to your objects to bring them to life and enhance their visual appeal.
- Sounds: Include sound effects to create a more immersive experience and provide feedback to players.
Part 3: The Big Secret – Level Design for Maximum Engagement
3.1 The Power of the "Flow"
The "flow" of your obby is crucial for player engagement. It’s about creating a smooth and natural progression through the course, keeping players challenged but not overwhelmed. Here are some tips for achieving optimal flow:
- Gradual Difficulty: Gradually increase the difficulty of obstacles as players progress. This creates a sense of accomplishment and prevents players from getting stuck too early.
- Visual Cues: Use visual cues like arrows, signs, or contrasting colors to guide players through the course.
- Clear Pathways: Avoid creating confusing or ambiguous pathways that force players to guess where to go.
- Variety of Obstacles: Mix up the types of obstacles to keep players engaged and prevent boredom.
3.2 The Art of "Surprise"
The element of surprise can make your obby truly memorable. Introduce unexpected challenges, hidden paths, or clever twists to keep players on their toes.
- Hidden Paths: Create secret paths that reward players for exploring and thinking outside the box.
- Unexpected Challenges: Throw in a few unexpected obstacles that require players to adapt quickly and think on their feet.
- Twists and Turns: Introduce sudden changes in direction, gravity, or environment to keep players engaged.
3.3 Leveraging the "Reward System"
Rewarding players for their progress is essential for maintaining motivation. Here are some ways to incorporate a rewarding system:
- Checkpoints: As mentioned earlier, checkpoints provide players with a sense of progress and save their efforts.
- Visual Feedback: Use visual effects or sound to provide positive feedback when players complete a challenging obstacle.
- In-Game Currency: Reward players with in-game currency for completing challenges or reaching certain milestones.
- Leaderboards: Add leaderboards to encourage players to compete and strive for the best times.
Part 4: Beyond the Basics – Advanced Obby Techniques
4.1 Harnessing Physics
Roblox’s physics engine can be a powerful tool for creating engaging obstacles. Here are some ways to leverage physics:
- Moving Platforms: Create moving platforms that require players to time their jumps or use them as momentum to reach higher areas.
- Gravity Manipulation: Use scripts to change the gravity of certain areas, creating challenges that require players to adapt to different conditions.
- Object Interactions: Design obstacles that require players to interact with objects in the environment, like pushing blocks or pulling levers.
4.2 Utilizing Advanced Scripting
Advanced scripting techniques can open up new possibilities for your obby. Here are some examples:
- Custom Animations: Create custom animations for your objects to add a unique touch to your obby.
- NPC Interactions: Introduce non-player characters (NPCs) that provide hints, interact with players, or even pose additional challenges.
- Custom UI: Design custom user interfaces (UI) for your obby, such as menus, scoreboards, or progress bars.
4.3 The "Big Secret" – Harnessing the Power of Community
One of the most effective ways to improve your obby is to leverage the power of the Roblox community. Here are some tips:
- Testing and Feedback: Share your obby with friends, family, or the Roblox community for testing and feedback.
- Collaboration: Collaborate with other Roblox developers to share ideas, get help with scripting, or even work together on a project.
- Community Forums: Join Roblox community forums to discuss obby creation, share tips, and learn from others.
Conclusion
Creating a compelling obby course in Roblox is a journey of creativity, technical skill, and community engagement. By following the steps outlined in this guide, you can build an experience that is both challenging and rewarding for players. Remember, the key is to have fun, experiment, and never stop learning!
Frequently Asked Questions
Q: What are the best resources for learning Roblox scripting?
A: Roblox’s official website offers excellent tutorials and documentation for Lua scripting. Other resources include:
- Roblox Developer Hub: https://developer.roblox.com/en-us/
- YouTube Channels: Numerous YouTube channels provide tutorials and guides on Roblox scripting.
- Roblox Forums: The Roblox forums are a great place to ask questions and get help from other developers.
Q: How can I make my obby more visually appealing?
A: Use a variety of parts, materials, and textures to create visually interesting environments. Experiment with lighting, shadows, and particle effects to add depth and atmosphere.
Q: What are some tips for designing challenging but fair obstacles?
A: Avoid creating obstacles that are too difficult or too easy. Provide players with clear cues and opportunities to practice before introducing more challenging obstacles.
Q: How can I get feedback on my obby?
A: Share your obby with friends, family, or the Roblox community for testing and feedback. You can also post your obby in the Roblox forums or on social media to get feedback from a wider audience.
Q: What are some popular obby games on Roblox?
A: Some popular obby games on Roblox include:
- The Obby: A classic and challenging obby course.
- Epic Obby: A popular obby with a variety of themes and obstacles.
- JToH (Tower of Hell): A challenging obby with a focus on tower climbing.
Q: Is there a limit to the size of my obby?
A: There is no strict limit to the size of your obby, but it’s important to consider the performance of your game. Larger obby courses can put a strain on the game’s performance, especially on older or less powerful devices.
Q: How can I make my obby stand out from the crowd?
A: Focus on creating a unique theme, incorporating innovative obstacles, and providing a compelling gameplay experience. Pay attention to visual appeal, sound design, and scripting to create an immersive and memorable experience.
Q: What are some of the latest trends in obby creation?
A: Some recent trends in obby creation include:
- Immersive Storytelling: Incorporating storylines and narratives into obby courses to create a more engaging experience.
- Advanced Physics: Utilizing Roblox’s physics engine to create more complex and challenging obstacles.
- Custom UI and Animations: Adding custom user interfaces and animations to enhance the visual appeal and interactivity of obby courses.
Q: What are some common mistakes to avoid when creating an obby?
A: Common mistakes to avoid include:
- Creating obstacles that are too difficult or too easy.
- Failing to provide clear cues and pathways for players.
- Ignoring the importance of visual appeal and sound design.
- Not testing your obby thoroughly before publishing it.
Q: What advice would you give to aspiring obby creators?
A: Don’t be afraid to experiment, learn from other creators, and most importantly, have fun! The Roblox community is a great resource for learning and sharing ideas, so don’t be afraid to reach out and connect with other developers.
Source URL: https://developer.roblox.com/en-us/
Closure
Thank you for reading! Stay with us for more insights on How to Create Your Own Obby Course in Roblox: From Beginner to Pro.
Don’t forget to check back for the latest news and updates on How to Create Your Own Obby Course in Roblox: From Beginner to Pro!
We’d love to hear your thoughts about How to Create Your Own Obby Course in Roblox: From Beginner to Pro—leave your comments below!
Keep visiting our website for the latest trends and reviews.